Jupyter Notebooks
Using the Jupyter notebooks for demonstration and exploration
Setup
Using the accompanying Jupyter notebooks requires a couple extra steps the first time. In order for Jupyter to access the packages installed in the virtual environment created earlier, we need to configure it to use that environment and then tell the Jupyter notebooks to use that virtual environment.
With your virtual environment activated, configure Jupyter to use Python kernel:
ipython kernel install --user --name=MY-CONDA-ENV-KERNELwhere MY-CONDA-ENV-KERNEL is the user-specified name of the kernel. For convenience and simplicity, it’s often best to call it the same name as your virtual environment. Thus, in the case of this example:
ipython kernel install --user --name=scaleageingWhen this is finished, navigate to the directory containing the Jupyter notebooks. For example:
cd notebooksTo launch a Jupyter notebook server, type
jupyter notebookwhich should open a web browser and display a file explorer. (If not, copy one of the URLs that prints to the terminal window and paste it into a web browser window.) Find and open any of the notebooks. When the notebook loads, at the top right of the notebook, locate the Python icon under which a dropdown menu shows which Python kernel the notebook is accessing. The default is usually “Python 3” or something similar. Click that and select the name of the kernel you just created.
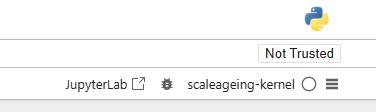
scaleageing-kernel.Repeat this for each notebook.
Opening the Jupyter notebooks after setup
The steps above should only need to be done once after creating the virtual environment. After that, simply use the command jupyter notebook to launch a Jupyter notebook server, as above, and open the desired notebook. The kernel should still be set, but it is best to verify just in case and reset if needed. Otherwise, you may not be able to load the necessary packages.